Introduction
A practical guide to deploying, hardening, and securing your own TAK Server - for the person who manages everything else too.
The Team Awareness Kit (TAK) ecosystem is one of the most consequential pieces of government-furnished software in the last decade. Originally developed by the Air Force Research Laboratory and now maintained by the TAK Product Center, TAK puts real-time geospatial situational awareness into the hands of anyone who wants it.
That includes:
- Blue force tracking (seeing your own people/vehicles on the map in real time)
- Cursor-on-Target messaging (TAK’s message format for sharing location, status, markers, alerts, and other map events)
- Mission Planning
- Data Sharing
And all you need is an Android phone, iPhone, or Windows laptop. The apps are free. The server is open source. The capability is real.
The problem is getting the damn thing running.
TAK Server has a well-earned reputation for being difficult to stand up. The official Docker release ships without a docker-compose.yml. The .deb installer pins to PostgreSQL 15, but Ubuntu 24.04 defaults to PostgreSQL 16, which breaks everything with cryptic database errors. Certificate generation involves a chain of shell scripts that assume you know what a PKCS#12 bundle is and why the password is atakatak. If that all sounds like a lot, good Every TAK Server setup guide on the internet follows the same arc: optimistic introduction, fifteen steps that mostly work, a section where you troubleshoot for two hours, and a triumphant screenshot of the admin UI that took far longer than it should have.
This guide is different. We built a CloudFormation template that automates the entire deployment onto AWS EC2 - Docker installation, image builds, certificate generation, database initialization, and admin provisioning (all of which you'll learn a little about, but not more than you need to) - in a single aws cloudformation create-stack command. You SSH in when it's done. The certs are waiting for you. The server is running.
AWS familiarity is not needed to follow this guide, but you will need to know some command line basics. Share this blog with your favorite LLM for faster troubleshooting.
Standing up the server is the easy part. The hard part is not getting owned. A TAK Server exposed to the internet with default credentials, no TLS termination strategy, no logging, and no access controls is a liability dressed up as a capability. This guide covers both: the deployment and the hardening, the standing-it-up and the keeping-it-alive, with honest tradeoffs at every decision point so you can pick the path that fits your constraints.
We wrote this for the person at a fire department, a sheriff's office, a SAR team, or a National Guard unit who is already managing radios, EUDs, drones, Starlink terminals, dispatch systems, P25 trunking, and God knows what else - and just got handed a box of Samsung phones with ATAK installed and a mandate to "make it work." You really don't need to be a DevOps engineer to make this happen. You just need to set up a working TAK Server with enough hardening that it won't become tomorrow's incident report.
Why TAK Server
If you're reading this, you probably already know you want a TAK Server. You don't need a pitch. But it's worth establishing what a TAK Server actually does so we can frame the deployment decisions that follow.
TAK Server is the backend that makes multi-device TAK work. Without it, ATAK and iTAK devices can share position and CoT (Cursor on Target) messages via multicast on a local network which is useful if everyone is on the same WiFi, but not useful for anything else. A TAK Server provides the centralized broker: TLS-encrypted CoT routing across the internet, persistent data storage, user and group management, federation with other TAK Servers, and the admin web UI for managing all of it. It turns a collection of standalone mapping apps into a coordinated common operating picture (a shared live map that everyone can use to see the same operational picture).
Federation is the force multiplier. A single TAK Server supports one organization. Federation lets multiple TAK Servers share data across organizational boundaries - your county SAR team federated with the state emergency management TAK Server, for example, or a National Guard unit federated with a joint task force. The architecture is built for this. It is one of the few genuinely interoperable C2 tools available to organizations that don't have a nine-figure IT budget.
The ecosystem is larger than you think. Beyond the official TAK Server from the TAK Product Center, there are community alternatives worth knowing about. OpenTAKServer (OTS) is an open-source Python-based implementation that runs on everything from a full server to a Raspberry Pi, with features like automatic CA generation and certificate enrollment that the official release makes you script yourself. FreeTAKServer (FTS) is another community implementation with a strong hobbyist following. COTAK - the Colorado Team Awareness Kit - is a state-run managed TAK service that Colorado provides free to all public safety agencies, with over 2,700 users and growing; it's a model for what other states should be doing. Infra-TAK is a newer project that automates full TAK infrastructure deployment - including LDAP, video server, and TAK-Portal for user management - with a single command line directive, and now supports auto-deployment to both AWS and Azure. Sit(x) by Booz Allen Hamilton offers fully managed TAK as a service.
We're focusing on the official TAK Server Docker release deployed to AWS because it's the most common path for organizations that need the full feature set and want to own their infrastructure. But if OTS or Infra-TAK better fits your constraints, use them. The ecosystem is cooperative, not competitive.
For what it's worth, Empyrean Defense integrates with TAK Server as a CoT data source - our platform pushes fused tracks, alerts, and operational data into TAK via the standard CoT protocol, so operators who live in ATAK get enriched data on their existing EUDs without switching tools. That's a sentence, not a sales pitch. Moving on.
Prerequisites and Signup
TAK.gov Account
Head to tak.gov and create an account. You'll need a valid email address and to accept the terms of use.
Once registered, navigate to the Products section and download the TAK Server Docker release. Docker packages an application and its dependencies into a portable container, so TAK Server can run with the versions of PostgreSQL and other components it expects instead of depending on whatever happens to be installed on the host server.
As of this writing, the current releases span from 5.5 (long-term stable) through 5.7 (newest, with WebTAK 4.10.5 and significant messaging performance improvements). The file you want is takserver-docker-5.X-RELEASE-XX.zip. Download it to your local machine.
The TAK Server source code is also available on GitHub at TAK-Product-Center/Server since the TAK Product Center open-sourced it in June 2022. You can build from source if you want, but the pre-built Docker release from tak.gov is the path of least resistance.
Docker vs. Hardened
For this guide, “Docker release” means we are running TAK Server and its database as containers on an AWS server. You do not need to be a Docker expert to use this template, but it helps to understand that the containers are the running TAK Server components. The Docker release ships Dockerfiles for both the application server and the PostgreSQL database.
There is also a hardened container image available on DoD Iron Bank for organizations operating in accredited JADC2 architectures. For exercise, training, and most operational deployments outside of DoD enclaves, the standard Docker release is what you want. If you're operating in a DoD environment with ATO requirements, talk to your ISSO about the Iron Bank image.
AWS Account
If you don't have an AWS account, create one at aws.amazon.com. You'll need to put a credit card on file. This deployment uses a reasonably sized AWS server and 30 GB of storage. At current AWS pricing, expect roughly $0.17/hour, or about $120/month if you leave it running continuously. For a weekend exercise, that is only a few dollars. For production, budget for it like any other always-on system.
For reference, the template uses a t3.xlarge EC2 instance with 4 vCPU, 16 GB RAM, and 30 GB of gp3 storage. Advanced users can use tools such as AWS EventBridge Scheduler and AWS Lambda to shut down the EC2 server during non-usage hours to save money too.
Services we'll touch: This guide uses a handful of AWS services to get the server running:
- Amazon EC2 for the server itself
- Amazon S3 to store the TAK Server ZIP
- AWS IAM (Identity Access Management) to let the server retrieve that file
- AWS CloudFormation to automate the setup, and security groups to control who can connect
Later, in the hardening section, we’ll cover optional AWS services that make the deployment safer and more production-ready: load balancers, logging, managed databases, key storage, and firewall controls. You do not need to understand or configure all of those on day one.
Predeployment Steps
Upload the TAK Server zip to an S3 bucket.
S3 is AWS file/object storage and the CloudFormation template uses it as a staging area so the EC2 server can download the TAK Server package during setup.
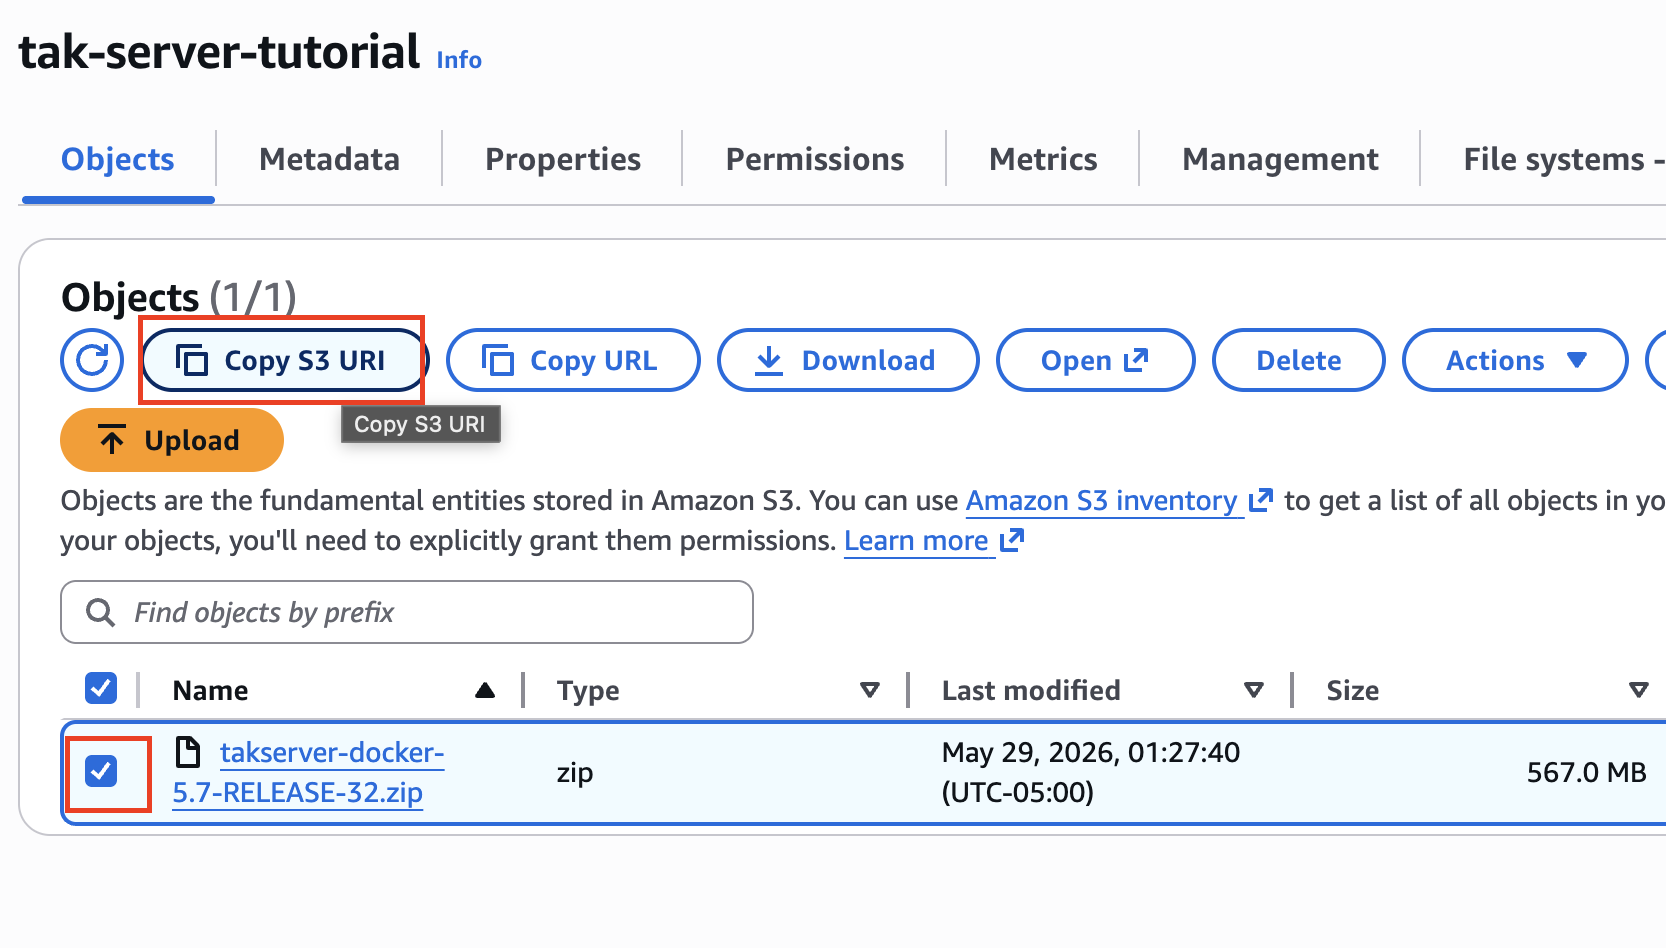
You will create a new private S3 bucket, upload the TAK Server ZIP you downloaded from tak.gov, and copy the S3 URI for the uploaded file. It should look like: s3://my-bucket/takserver-docker-5.5-RELEASE-75.zip
- Create the S3 bucket.
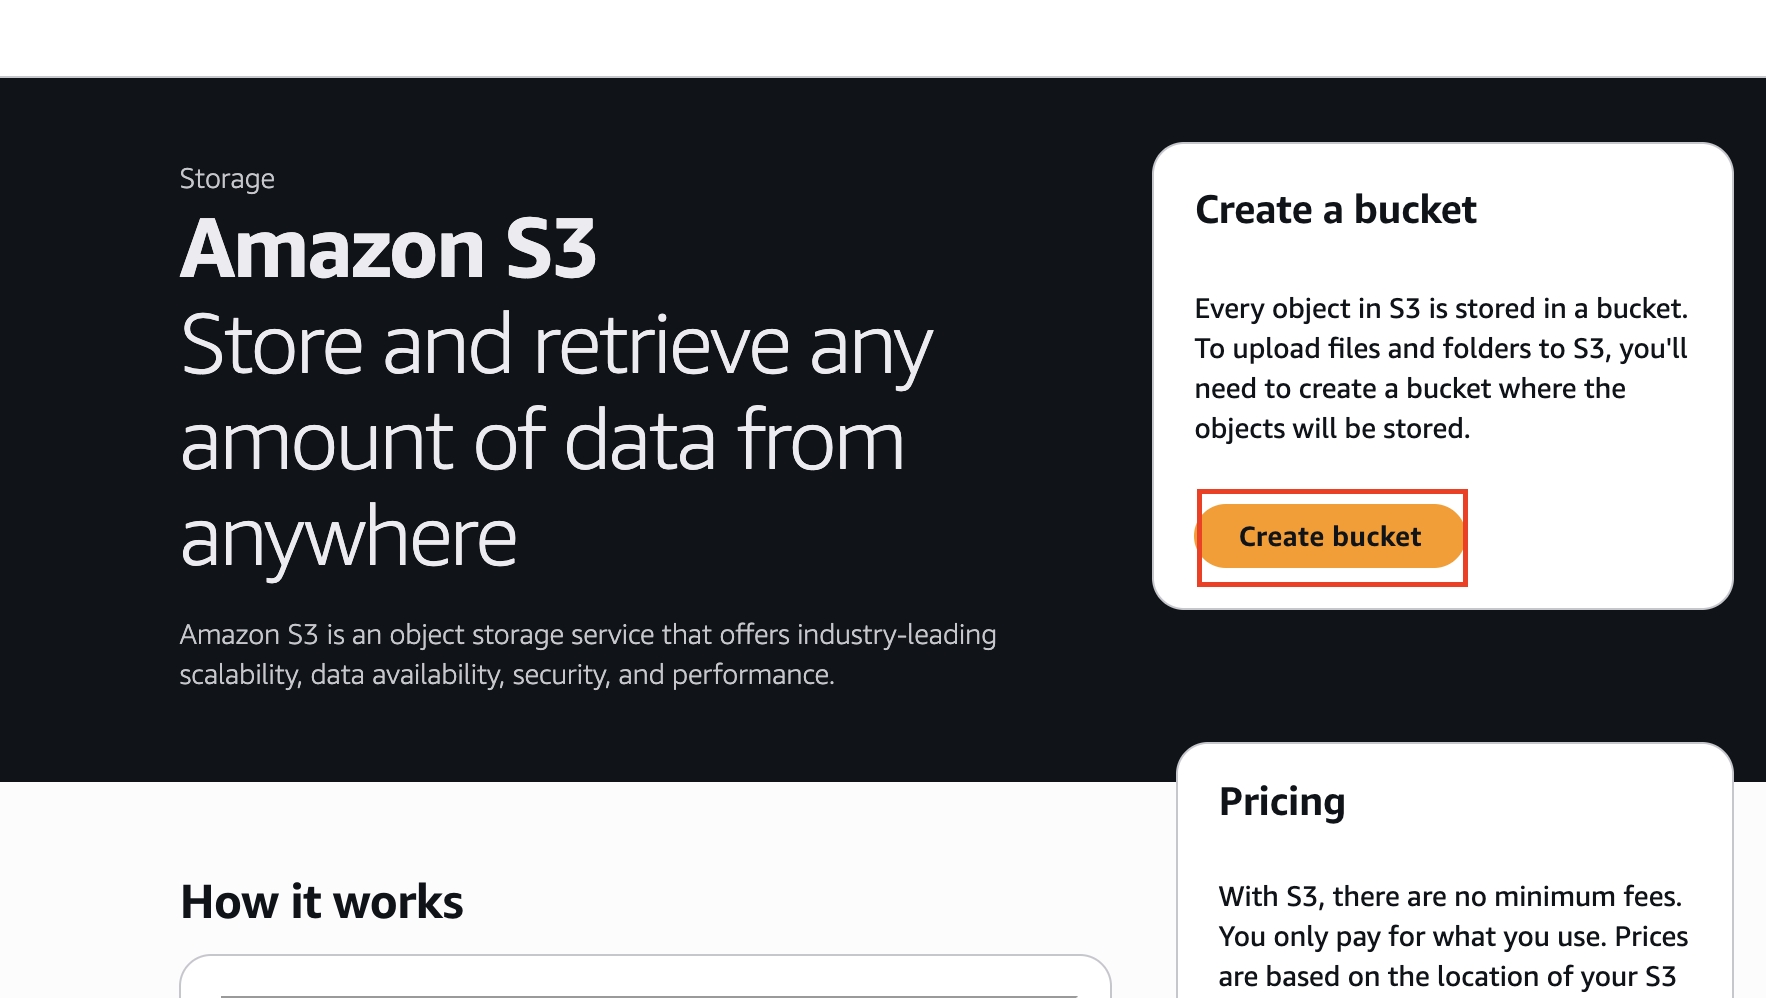
Create a new S3 bucket, give it a unique name, and leave the default settings in place unless your organization has a specific AWS policy.
You do not need to make the bucket or file public. The template gives the EC2 instance permission to read the file through IAM.
- Upload the TAK Server ZIP
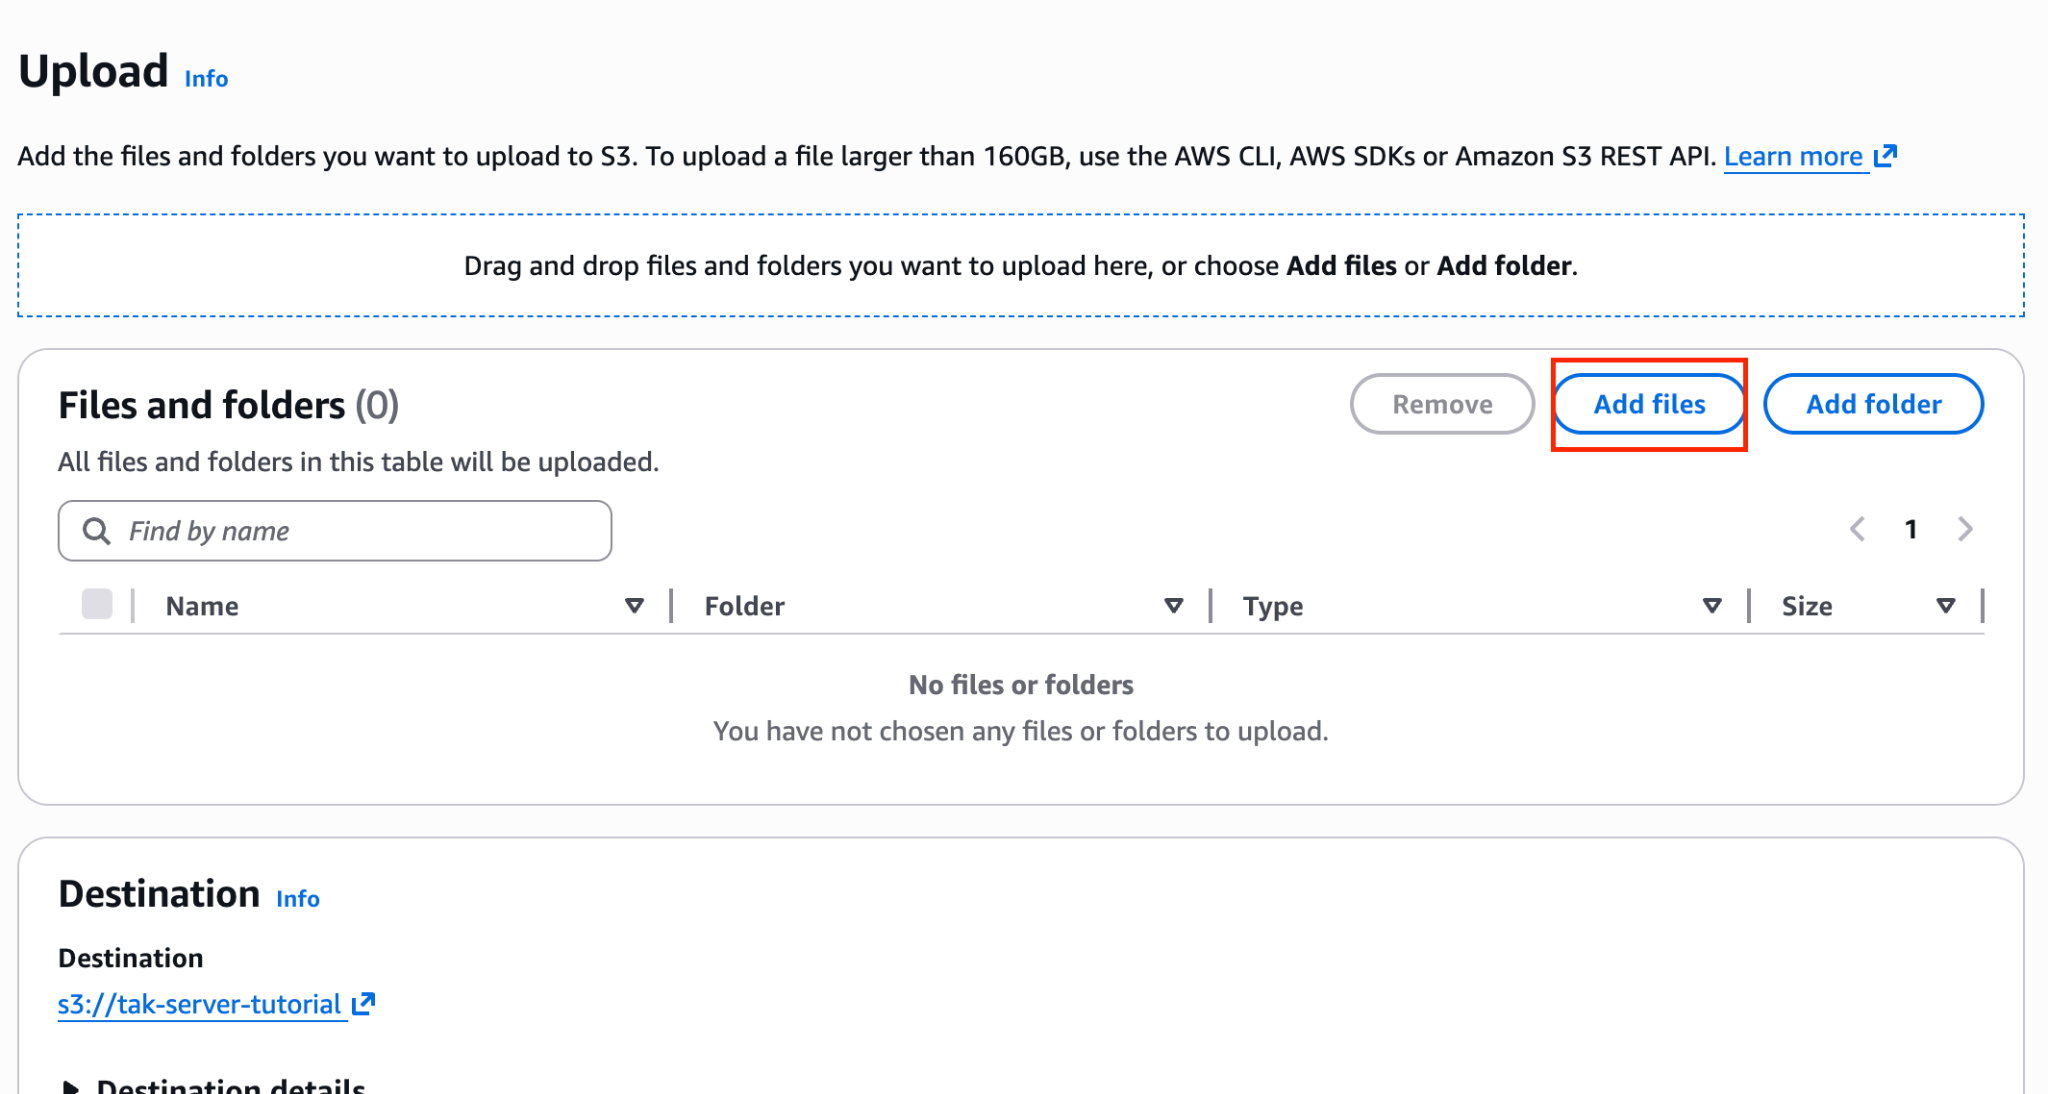
Once you've selected the ZIP file, click "Upload".
When the upload finishes, close the upload status panel. You do not need to save anything from this screen.
- Copy the S3 URI
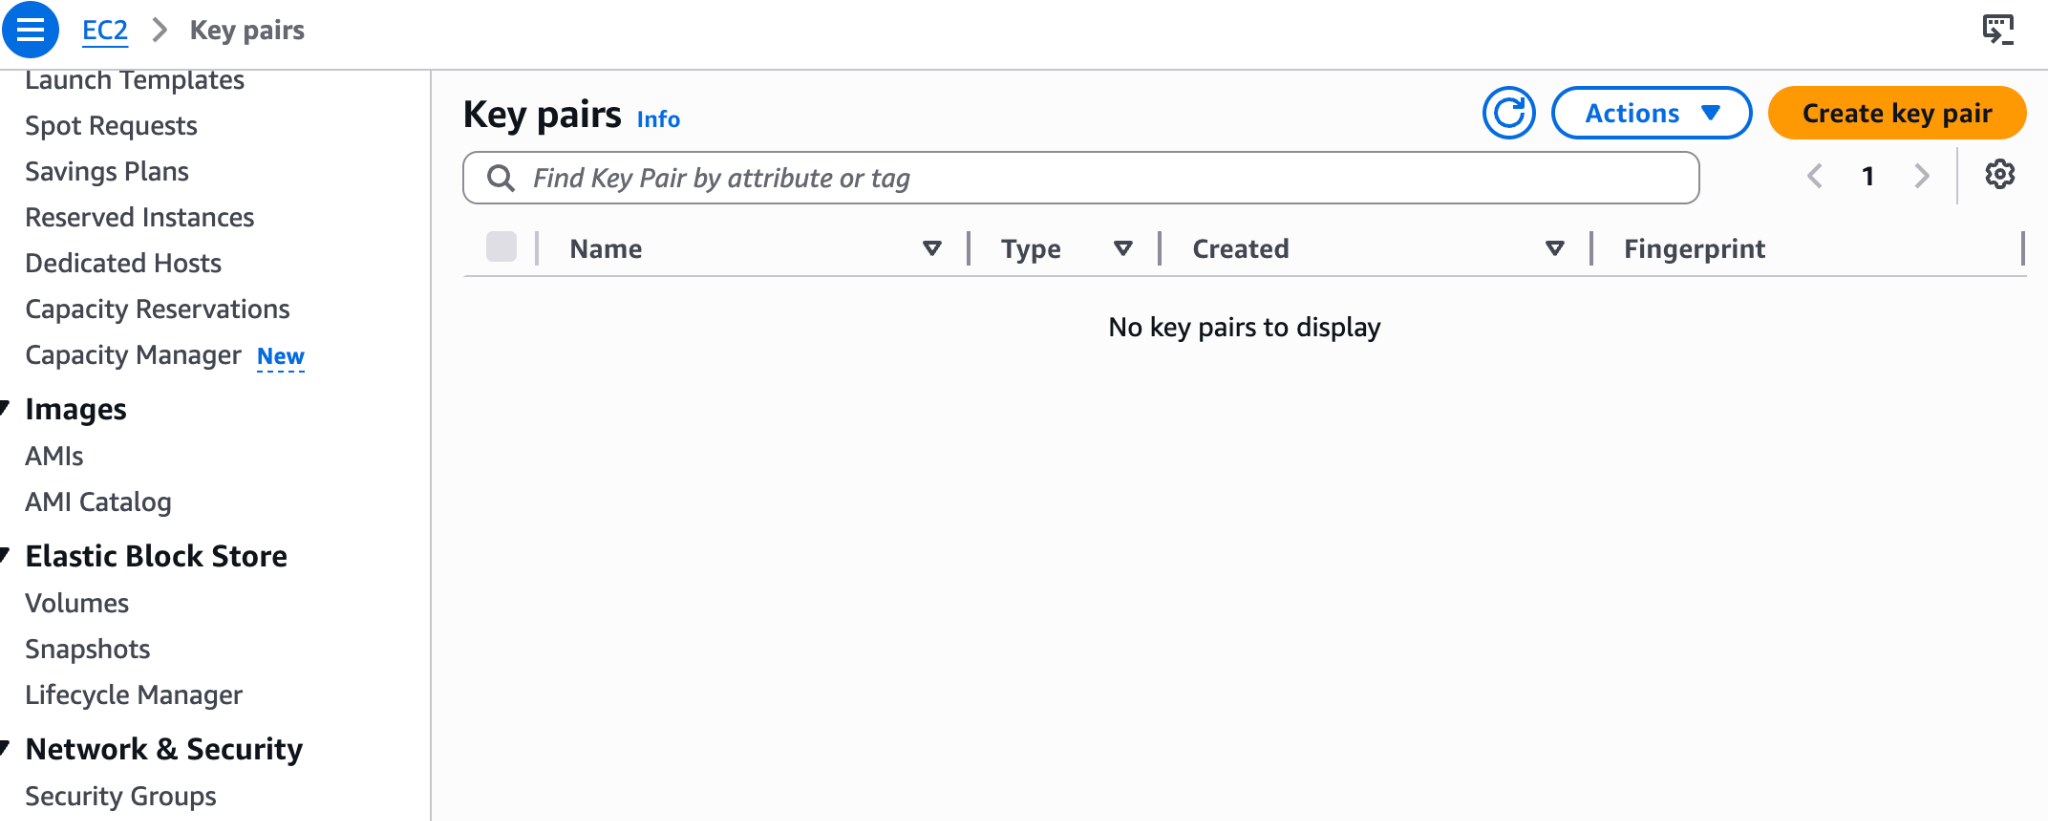
Create or identify an EC2 key pair.
You also need an EC2 key pair. This is what lets you SSH into the server after AWS creates it.
SSH is the remote login method for the server. The .pem file is your private key. Treat it like a password and do not email it, do not upload it to a shared drive, and do not lose it.
In the AWS Console, search for EC2 and open the EC2 service. In the left sidebar, go to Network & Security → Key Pairs, then click Create key pair.
Give the key pair a clear name, such as: tak-server-key.
For Private key file format, choose .pem. This guide uses terminal-based SSH commands, which expect a .pem key file.
Click Create key pair. AWS will immediately download the private key file. Save it somewhere safe.
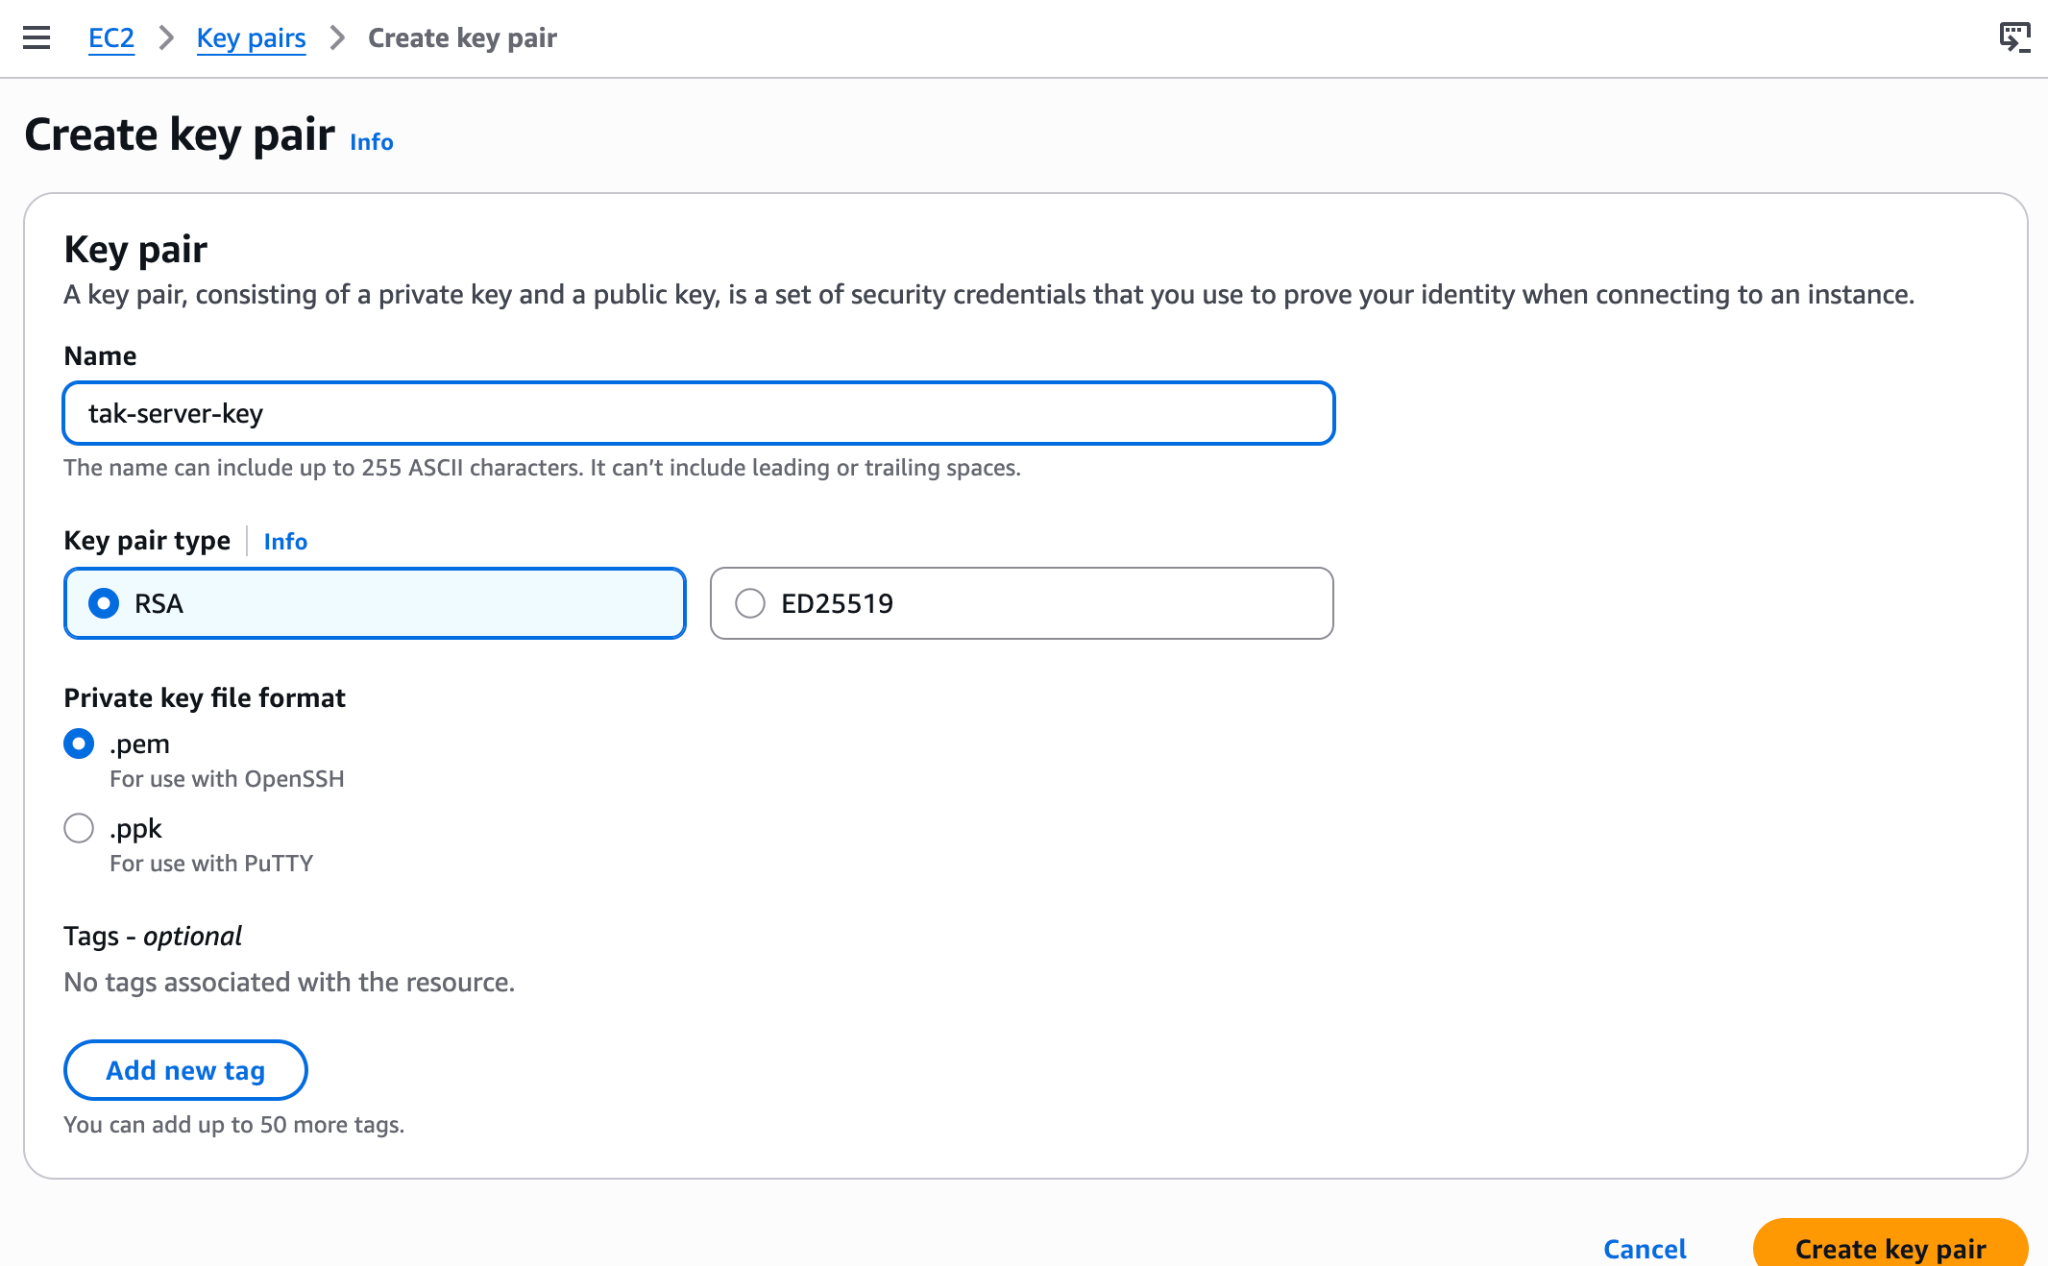
AWS only lets you download this file once. If you lose it, you cannot download it again.
For convenience, create a folder for this tutorial and move the key there.
You will use the key pair name in the CloudFormation command in a later step and you will use the downloaded .pem file to SSH into the server.
Deploying to AWS with CloudFormation
What CloudFormation Does
AWS CloudFormation is known as infrastructure-as-code, literally: you are defining cloud infrastructure services as code. You give it a YAML (or JSON, if you hate life) template describing the resources you want - EC2 instances, security groups, IAM roles - and it provisions everything in the right order, with dependency management, rollback on failure, and one-click teardown when you're done. No clicking through the console or forgetting which security group rule you added at 2 AM.
In this guide, the CloudFormation template creates the AWS pieces needed to run TAK Server and then runs a startup script that installs and configures the server for you.
At a high level, it creates:
| AWS resource | What it does |
|---|---|
| IAM role | Gives the new server permission to download the TAK Server ZIP from S3. Think of it as a temporary permission badge for the server, not a hardcoded password. |
| Security group | Acts as the cloud firewall for the server. It controls which ports are reachable and from which IP addresses. |
| EC2 instance | The actual AWS server where TAK Server runs. |
| Startup script | Installs Docker, downloads the TAK Server package, builds the containers, generates certificates, starts the database and TAK Server, and creates the admin user. |
The security group opens only the ports TAK needs:
| Port | Purpose |
|---|---|
| 22 | SSH access so you can log into the server |
| 8089 | TAK TLS CoT traffic |
| 8443 | TAK admin web UI |
| 8446 | TAK certificate enrollment |
Those ports are scoped to the CIDR range you provide. For testing, use your own (ipv4) public IP address with /32 at the end. /32 means “only this one IP address.”
The entire boot sequence takes roughly 10-15 minutes. CloudFormation will signal completion when the TAK Server is ready.
Running the Deployment
A Recommendation
Even though we've made this guide as beginner friendly as we could, if you're shaky on any of these steps, we highly recommend pasting a link to this blog in the LLM of your choice (Claude, ChatGPT, Gemini, etc) with your specific operating system and a request to walk you through it step by step for your exact circumstances.
Install and Configure the AWS CLI
To deploy the stack, you need the AWS CLI v2 installed and authenticated on your machine.
The AWS CLI is the command-line tool that lets you create AWS resources from your terminal instead of clicking through the AWS console.
Install AWS CLI v2 using the instructions for your operating system:
https://docs.aws.amazon.com/cli/latest/userguide/getting-started-install.html
Once it is installed, confirm that it works:
aws --version
Next, authenticate the AWS CLI.
For a personal or tutorial AWS account, the simplest path is usually:
aws configure
When you run it, AWS asks for an Access Key ID and Secret Access Key. These are credentials for the AWS CLI. Think of them like a username and password for your terminal session.
You can create them in the AWS Console under:
IAM → Users → Security credentials → Create access key
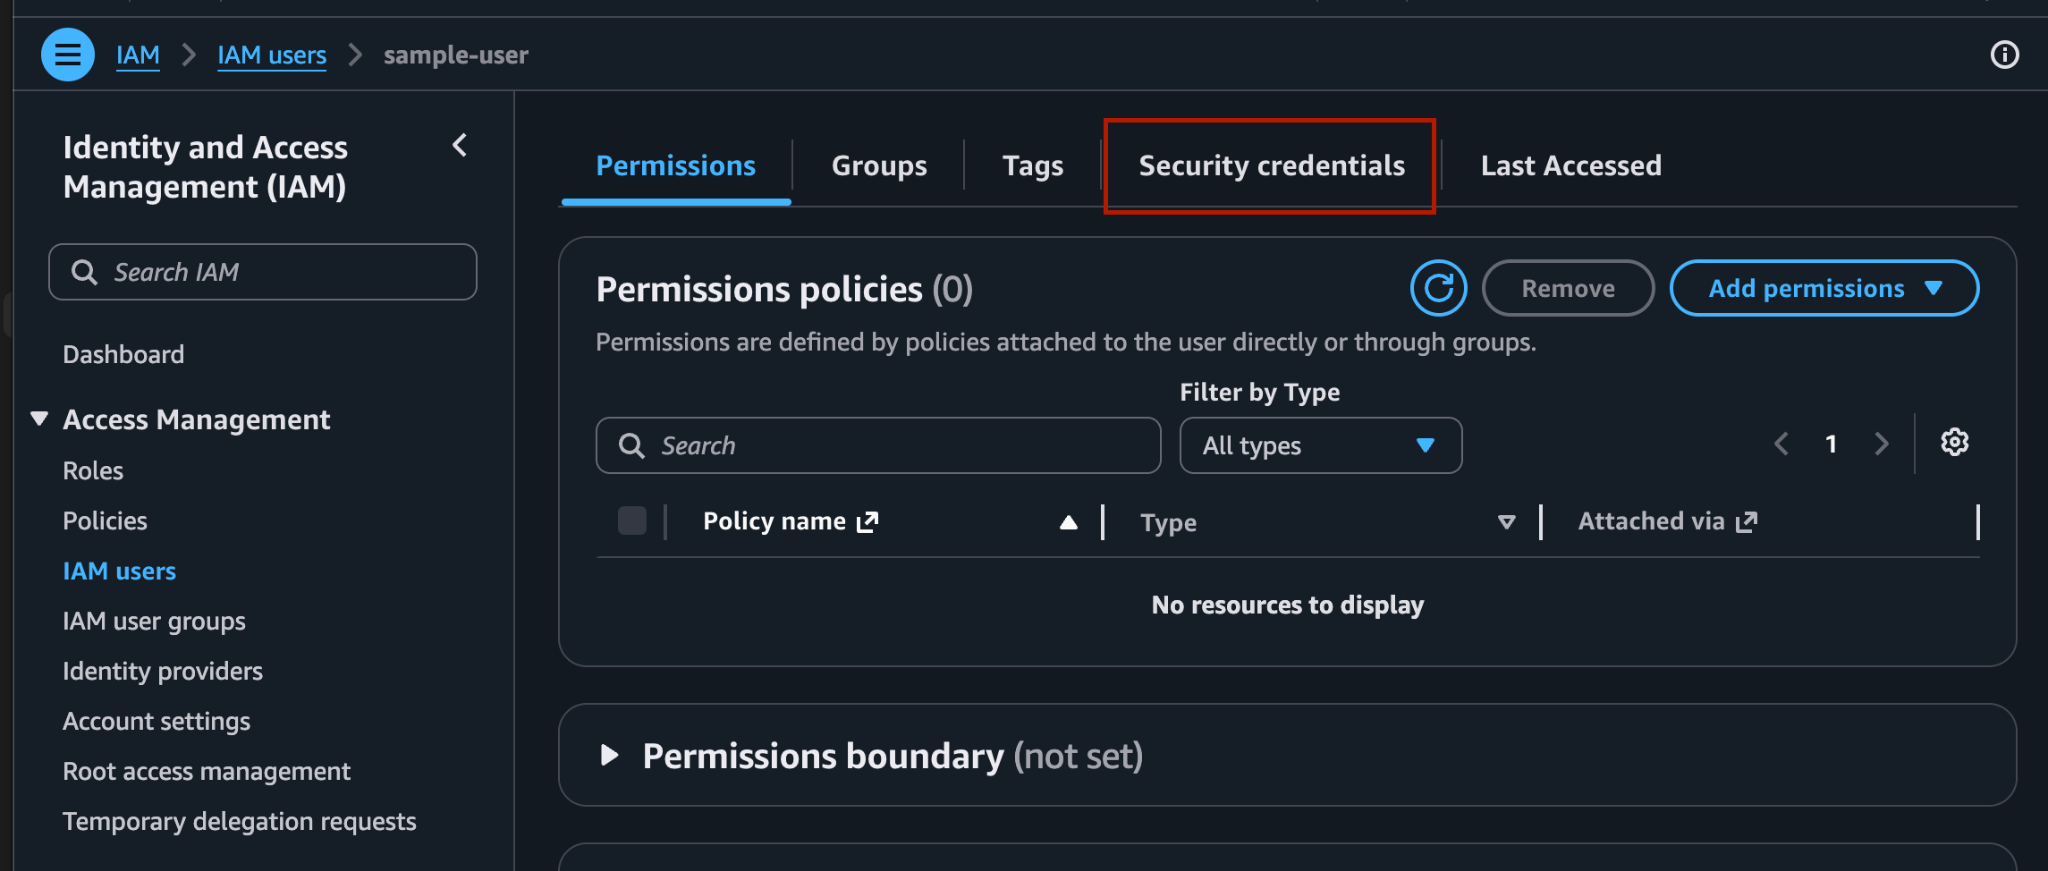
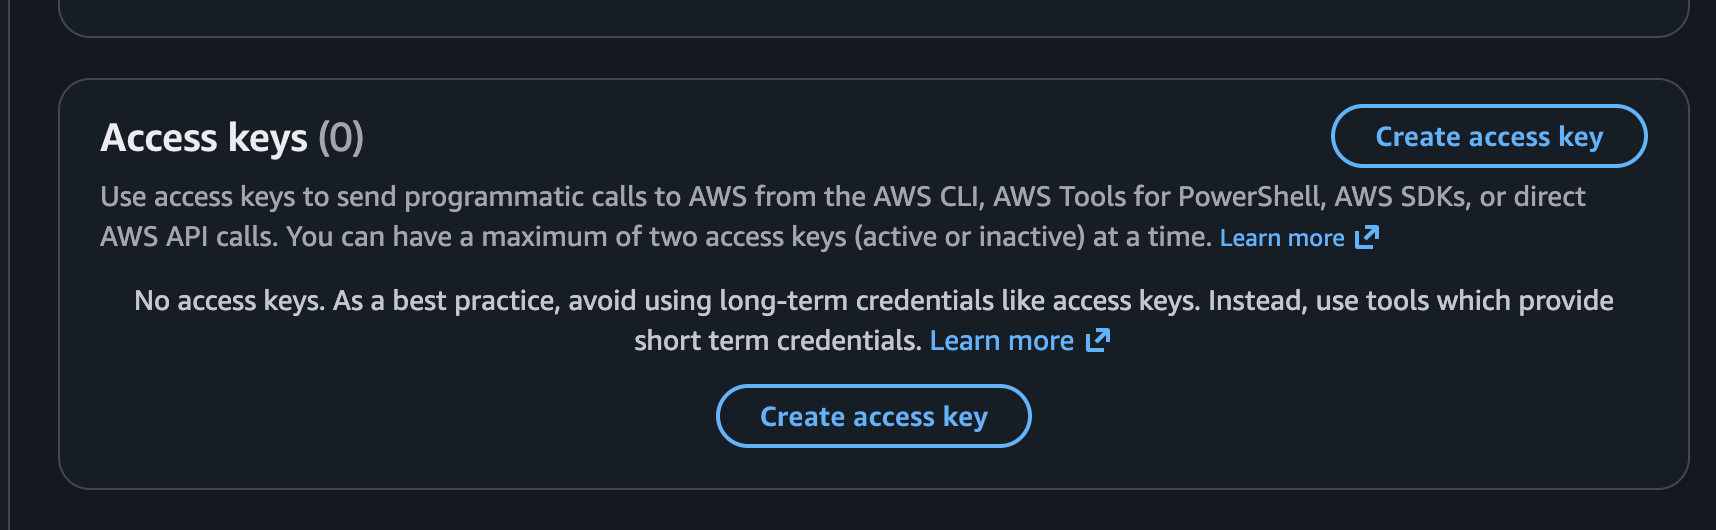
Use these credentials only for this tutorial or other low-risk practice work. Treat the secret access key like a password: do not share it, paste it into documentation, commit it to GitHub, or include it in screenshots.
AWS will also ask for a default region and output format. Use the same AWS region where you want to deploy the TAK Server. For example: us-east-2
For output format, use: json
For production or work AWS accounts, use this instead if your organization supports AWS Identity Center or another federated login method: aws configure sso
This avoids long-lived access keys and is usually the safer approach.
For this tutorial, either authentication method is fine as long as the AWS CLI can create CloudFormation, EC2, IAM, S3, and security group resources in your AWS account.
Once the AWS CLI is installed and authenticated, run the deployment command below.
aws cloudformation create-stack  \
  --stack-name empyrean-tak-server  \
  --template-body file://tak-server-cfn.yaml  \
  --parameters  \
    ParameterKey=KeyPairName,ParameterValue=*THE_NAME_OF_YOUR_KEY_PAIR* \ ParameterKey=TakServerZipS3Uri,ParameterValue=*s3://YOUR_BUCKET/takserver-docker-WHATEVER_VERSION_YOU_HAVE.zip*  \
    ParameterKey=AllowedCidr,ParameterValue=*YOUR_IP*/32  \
  --capabilities CAPABILITY_IAM
Replace YOUR_KEY_PAIR with your EC2 key pair name, the S3 URI with your actual bucket and filename, and YOUR_IP/32 with your public IP address followed by /32 to restrict access to just your machine. Do not leave AllowedCidr at the default 0.0.0.0/0 for anything beyond a throwaway exercise. That opens every port to the entire internet /32 means “only this one IP address.” It is the tightest possible IP allowlist.
Verifying the Deployment
Monitor the stack creation:
aws cloudformation describe-stacks --stack-name empyrean-tak-serverWhen the stack status shows CREATE_COMPLETE, grab the outputs:
aws cloudformation describe-stacks  \
  --stack-name empyrean-tak-server  \
  --query 'Stacks[0].Outputs'
This gives you the public IP, admin URL, CoT endpoint, and SSH command. SSH into the instance and check the setup log:
ssh -i YOUR_KEY.pem ubuntu@<PublicIp>If you see a 'bad permissions' warning, run chmod 400 your-key-file.pem - this locks the file so only you can read it, which SSH requires for security.
sudo tail -f /var/log/tak-setup.log(Control+C to escape)
You should see "TAK Server 5.5 setup complete!" at the bottom.
Getting Into the Admin UI
Before you can do much of anything, you will need to install the TAK certificates. This is what will allow your End User Devices (the phones, tablets, and laptops running ATAK, iTAK, or WinTAK. Abbreviated as EUDs) to authenticate and will also allow your browser of choice (Firefox, Chrome, etc.) to trust and authenticate with your TAK Server. Without it, you will not be able to get into WebTAK or the admin UI.
- Leave your ssh terminal open. Open a second, local terminal, navigate to your folder for this project, and copy the admin certificate to your local machine:
scp -i YOUR_KEY.pem ubuntu@<PublicIp>:/home/ubuntu/tak-certs/admin.p12 .(You may run into issues specific to your machine in this step. If you do it is likely a permissions issue that an LLM can guide you through.)
- Import
admin.p12into your browser's certificate store (the password is atakatak - we'll address this in the hardening section)
This is another area where having an LLM guide you through with specifics for your setup will be helpful. Here's what we had to do for Brave/Chrome on MacOS:
In your local terminal:
open admin.p12This will bring up Keychain Access. You may need to put in your own MacOS user password.
Save the certificate as a login (it will default to 'local items')
Enter the password (atakatak)
- Navigate to https://
:8443 - Accept the self-signed certificate warning ("Proceed anyway")
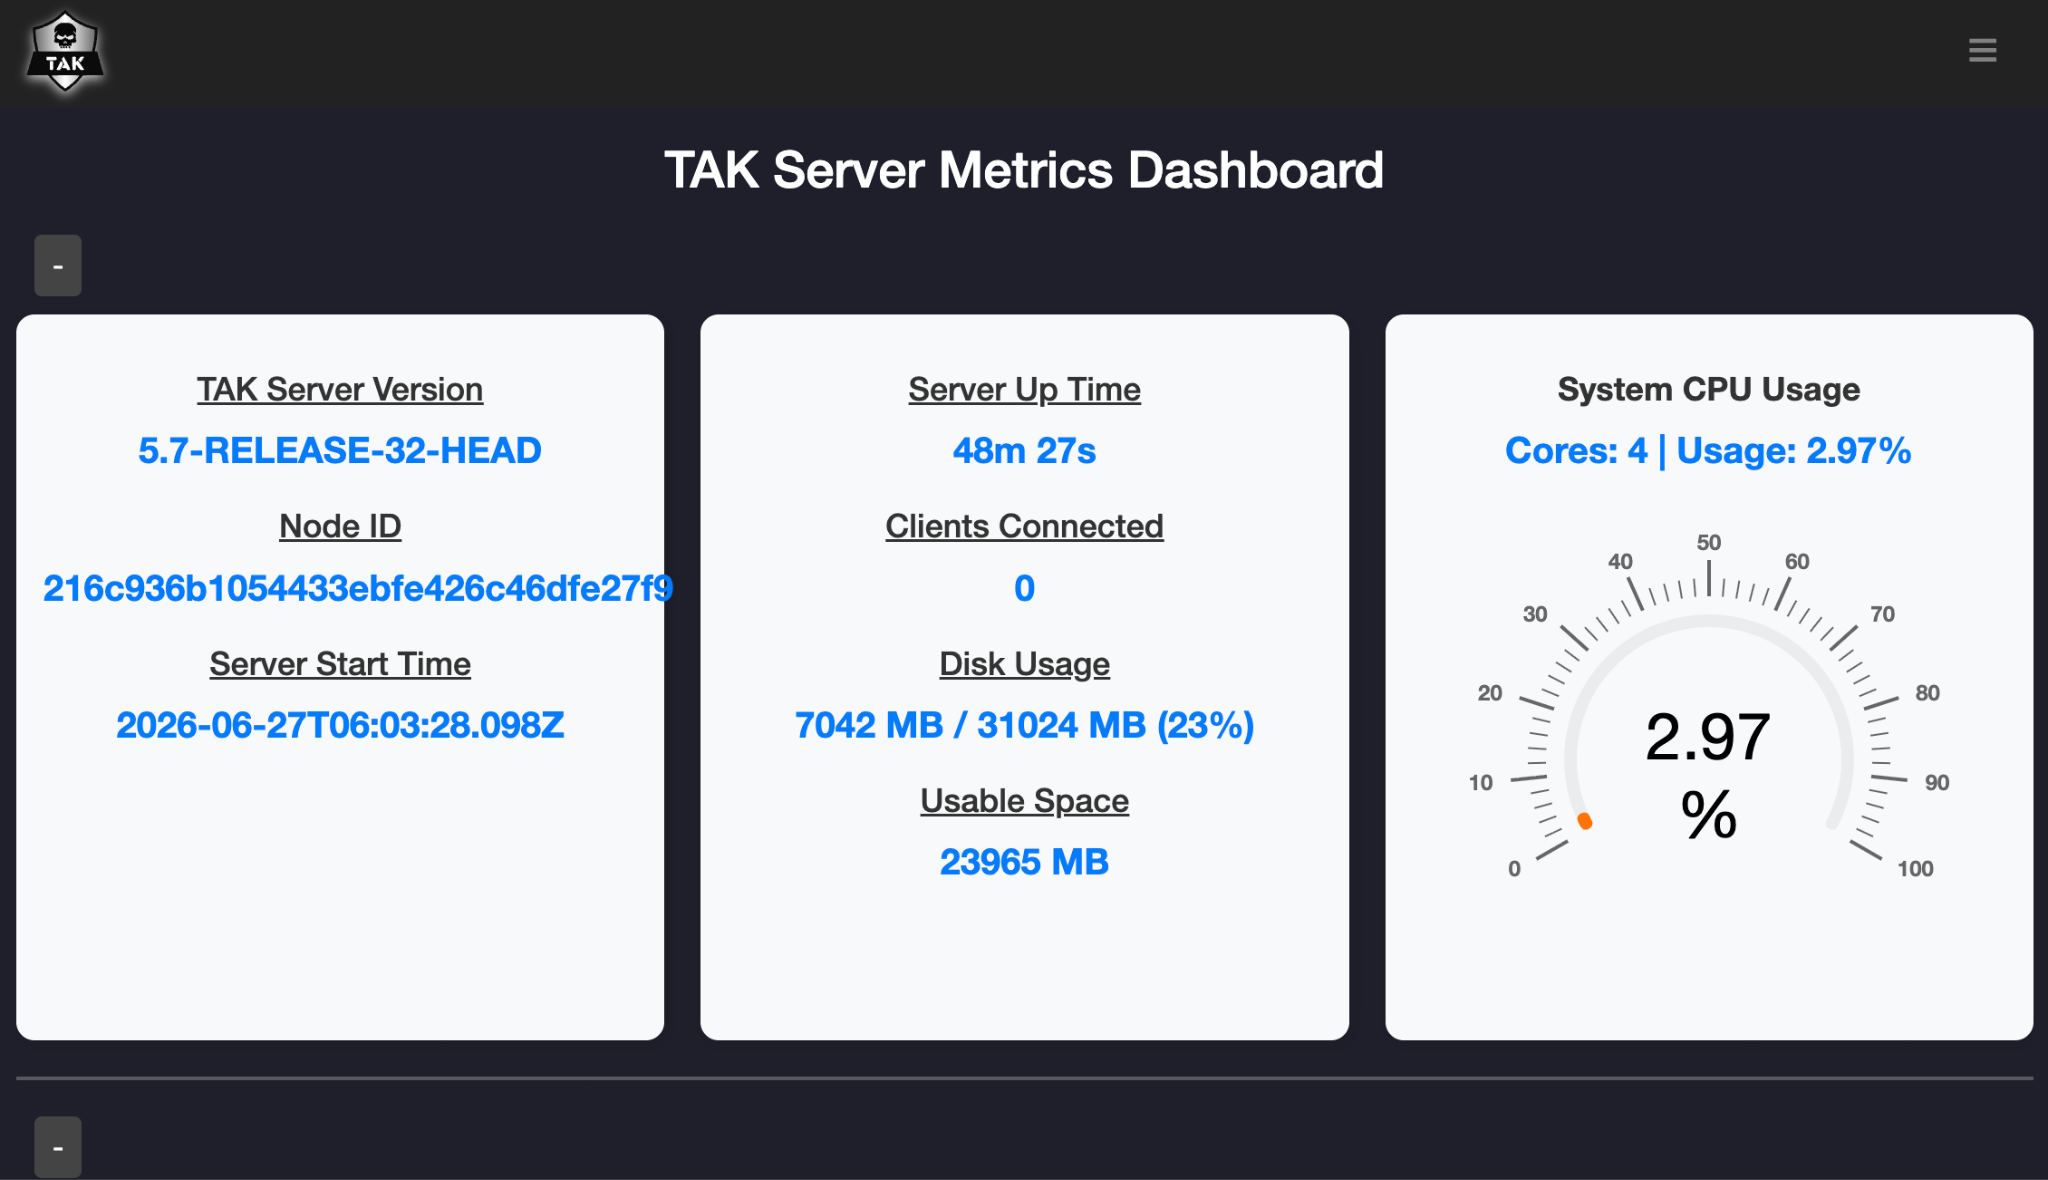
- You should see the TAK Server admin dashboard
Troubleshooting
"Connection refused" on 8443: The TAK Server application takes 2-3 minutes to fully start after the container launches. The UserData script waits and retries, but if you're impatient, check “docker logs takserver” for the API startup message.
"Bad certificate" error: This means the server is running - it's rejecting your connection because you haven't imported the admin client certificate yet.
Database errors on startup: TAK Server 5.5 through 5.7 all pin to PostgreSQL 15. Our template uses the official Docker images which bundle the correct version, so this shouldn't bite you. If you're doing a bare-metal install instead, make sure you install PostgreSQL 15 explicitly from the PGDG APT repo - Ubuntu 24.04's default apt install postgresql gives you 16, and TAK Server will throw cryptic SCRAM authentication errors.
Docker build failures: Ensure the EC2 instance has internet access (it needs to pull base images). If you're deploying into a private subnet, you'll need NAT Gateway or VPC endpoints for ECR and S3.
Pausing or Tearing Down Your Deployment
The CloudFormation stack spins up real infrastructure that bills by the hour whether anyone is connected to it or not. At roughly $0.17/hour, a server you stood up for a weekend exercise and forgot about becomes $120 by the end of the month. Here's how to shut it down cleanly when you're done and how to pick it back up later without starting from scratch.
If you're pausing and plan to come back:
The fastest option is to stop the EC2 instance rather than deleting the whole stack. Stopping the instance pauses the hourly compute charge while preserving everything on the server - your certificates, your configuration, your data. You'll still pay a small amount for the 30GB of storage while it's stopped (a few cents a day), but you can restart it in minutes and pick up exactly where you left off.
To stop the instance from the AWS console, go to EC2 -> Instances, select your instance, and choose Instance State -> Stop. To restart it later, select it again and choose Start. Note that the public IP address will change when you restart - you'll need to update your EUD connection settings with the new IP.
If you're done and want to fully tear down:
Delete the entire stack with one command. This shuts down and removes the EC2 server, the firewall rules, and the associated permissions all at once:
aws cloudformation delete-stack --stack-name empyrean-tak-server --region us-east-2Wait a minute or two for it to break itself down and then confirm it's fully gone:
aws cloudformation describe-stacks --stack-name empyrean-tak-server --region us-east-2When the stack is deleted you'll get an error saying it doesn't exist - that's the confirmation you want.
If you want to clean up your S3 bucket as well, empty it first then delete it:
aws s3 rm s3://your-bucket/ --recursive
aws s3 rb s3://your-bucket/
When you're ready to redeploy: keep your .pem key file and your tak-server-cfn.yaml template somewhere safe. With those two files and the TAK Server ZIP back in S3, you can be back up and running in under fifteen minutes.
Hardening and Operationalization
Standing up an EC2 instance with TAK Server running is a starting point, not a destination. What follows is the difference between a demo and a deployment. Hardening as a concept within cloud security means deploying and configuring additional security related services to act as compensating controls. What is that? Glad you asked, it’s just a dorky way of saying that you are configuring things to stop bad actors and morons from gaining unauthorized access to your resources, or at least mitigating a vast majority of boring internet-borne threats that your local newscaster calls a “hack”.
TLS Termination and Load Balancing
A bare EC2 instance with TAK Server ports exposed directly to the internet is fine for an exercise. For anything with real users, put a load balancer in front.
Network Load Balancer (NLB) for CoT traffic on port 8089. CoT is a persistent TLS connection carrying XML messages. NLB operates at Layer 4 (TCP), which is what you want - it passes the TLS connection through to TAK Server without terminating it, preserving the mutual TLS (mTLS) client certificate authentication that TAK uses. mTLS means both sides prove who they are with certificates: the server proves itself to the client, and the client proves itself to the server. NLB is also the cheapest option and adds virtually zero latency. Create a target group pointing at your EC2 instance on port 8089, attach it to an NLB, and point your EUDs at the NLB's DNS name instead of the raw IP.
Application Load Balancer (ALB) for the admin UI on port 8443. The admin web UI is HTTPS, and ALB gives you more control: path-based routing, AWS Certificate Manager integration for a real TLS certificate (so you stop clicking through browser warnings), access logs, and WAF integration. Note that TAK Server's admin UI uses mTLS - clients must present a certificate. ALB supports mTLS passthrough mode, but the configuration is more involved. For simpler setups, an NLB on with a target group on port 8443 works fine too, after all HTTPS is just TCP on the network layer.
Web Application Firewall
If you're using an ALB, bolt on AWS WAF. The managed rule groups - AWSManagedRulesCommonRuleSet and AWSManagedRulesKnownBadInputsRuleSet - catch the low-hanging fruit: SQL injection attempts, XSS, path traversal, and known-bad user agents. Add an IP set condition to allowlist your organization's IP ranges and deny everything else. WAF logs go to CloudWatch or S3 for forensics.
Logging
At minimum, enable these:
- VPC Flow Logs capture every network connection to and from the instance - who connected, when, how much data moved, and whether the connection was accepted or rejected. Send them to CloudWatch Logs or S3. These are your audit trails for the network layer.
- CloudWatch Agent on the EC2 instance, pushing /var/log/tak-setup.log and the TAK Server application logs (/opt/tak/logs/) to CloudWatch. If the server dies at 3 AM, you want to know why without SSH’ing in.
- DNS Query Logging via Route 53 Resolver if you're using a custom domain. This catches DNS-based exfiltration and gives you visibility into what the instance is resolving.
Database: Container vs. RDS
The CloudFormation template runs PostgreSQL 15 in a Docker container alongside TAK Server. This is fine for exercises and small deployments. For production use with real uptime requirements, consider moving the database to Amazon RDS for PostgreSQL or Aurora PostgreSQL.
The tradeoffs are straightforward: RDS gives you automated backups, point-in-time recovery, Multi-AZ failover, automated patching, and monitoring - things you'd have to build yourself with a containerized database. It costs more (a db.t3.medium PostgreSQL instance runs about $50/month) and adds network latency between the application and database containers. For a 10-person SAR team running exercises on weekends, the container is fine. For a 200-user statewide deployment, RDS is worth the money.
To migrate: stand up an RDS PostgreSQL 15 instance with PostGIS, update the CoreConfig.xml database connection block to point at the RDS endpoint, and restart the TAK Server container. The schema migration happens automatically on first boot.
Certificate Management
Change the default passwords immediately. The template generates all certificates with the password atakatak because that's what the TAK Server cert scripts default to. This is fine for the initial setup. It is not fine for production. Regenerate your CA and all client certificates with strong, unique passwords before distributing them to users.
Distribute certs securely. Don't email P12 files. Don't put them on a shared drive. Use AWS Systems Manager Parameter Store with SecureString parameters encrypted by a KMS Customer Managed Key to store the certificates. Client devices can pull their certs via a secure download link, or you can push them to an S3 bucket with pre-signed URLs that expire after a set time. For in-person distribution - which is the right answer for high-security deployments - copy the P12 files onto a USB drive and hand them out during a briefing.
Network-Level Inspection
For organizations that need deep packet inspection or inline threat detection, AWS Network Firewall provides stateful inspection of all traffic entering and leaving the VPC. It supports Suricata-compatible IDS/IPS rules, domain filtering, and TLS inspection. This is the nuclear option - it adds cost and complexity - but for deployments handling sensitive operational data, it may be a compliance requirement. Most exercise and training deployments don't need it.
Securing Access: VPN and Overlay Networks
IP allowlisting via security groups works when your users have static IPs. When your EUDs are on cellular LTE, Starlink, hotel WiFi, or any network where the public IP changes every time the device reconnects, allowlisting becomes a game of whack-a-mole. The answer is a VPN or overlay network that gives every authorized device a stable, private IP regardless of the underlying transport.
Three options, each with a different tradeoff:
WireGuard
Best for: maximum performance, minimum cost, full control. WireGuard is a kernel-level VPN protocol that's fast, lean, and well-audited. You run a WireGuard server (on the same EC2 instance as TAK Server, or on a dedicated instance), generate a config file per client device, and distribute those configs. Each device gets a stable private IP on the WireGuard network. Your TAK Server security group then only needs to allow traffic from the WireGuard subnet - nothing is exposed to the public internet.
The tradeoff: you own the key distribution. Every new device means generating a new WireGuard peer config, copying it to the device, and importing it. For a 10-person team, this is trivial. For 200 users across multiple agencies, it's a management burden. WireGuard also requires a publicly reachable endpoint with a static IP or DNS name, which means your WireGuard server needs an open UDP port (default 51820).
Empyrean Defense uses WireGuard for our deployments, it is what secures our TAK EUD bridge, our TAK Server deployments (optionally), and Digital Force Protection sensors (optionally) from Network Survey, as well as Kismet and WiGLE down the road when we add support for them.
ZeroTier
Best for: easiest setup, devices that move between networks frequently. ZeroTier creates a virtual Layer 2 network - your devices behave as if they're on the same LAN regardless of their physical location. Install the ZeroTier client on the TAK Server and on each EUD, join them to the same network ID, and they can reach each other. No ports to open, no static IPs required, no NAT traversal headaches. ZeroTier handles all of it through UDP hole punching.
The tradeoff: you're trusting ZeroTier's coordination server. Your actual traffic goes peer-to-peer (not through ZeroTier's infrastructure), but the key exchange and peer discovery does. ZeroTier uses a custom protocol rather than WireGuard, which has received less external security scrutiny. The free tier supports up to 25 devices, which is enough for most small teams. Paid plans start at $5/month for more nodes. ZeroTier is US-based and subject to the CLOUD Act, which may matter for some organizations.
AWS Client VPN
Best for: organizations already invested in AWS, compliance requirements that mandate a single vendor. AWS Client VPN provides a managed OpenVPN-compatible endpoint in your VPC. Users connect with the AWS VPN client or any OpenVPN-compatible client, authenticate via Active Directory or mutual TLS, and get a private IP on a subnet you define. All traffic to the TAK Server stays within the VPC.
The tradeoff: cost and client experience. AWS Client VPN charges $0.10 per connection-hour on top of the endpoint association fee ($0.10/hour per subnet). For 20 users connected 8 hours a day, that's about $500/month - significantly more than WireGuard (free) or ZeroTier ($5/month). The AWS VPN client software works but isn't great, and Android support requires a third-party OpenVPN client.
Tailscale
Worth a mention as a fourth option. Tailscale is a managed WireGuard overlay network with excellent UX - install the app, sign in, done. It uses WireGuard under the hood, handles NAT traversal and key rotation automatically, and offers a generous free tier (100 devices, 3 users). The tradeoff is like ZeroTier: you're trusting a third-party coordination server, though Tailscale's control plane is well-regarded in the security community. If your threat model allows a managed service and you want WireGuard performance without WireGuard administration, Tailscale is the best-of-both-worlds option.
Our recommendation for most TAK deployments: Start with WireGuard if you have someone comfortable with Linux networking. Start with Tailscale or ZeroTier if you don't. Move to AWS Client VPN only if compliance demands it.
Data Packages and Imagery
TAK Server distributes operational content to connected EUDs through data packages - ZIP files containing map tiles, elevation data, overlays, KML/KMZ files, CoT templates, icons, and other mission-specific content. When a user connects to the server, data packages assigned to their group are automatically synced to their device. This is how you push a common map baseline, points of interest, route plans, and standard operating graphics to every phone in the field without touching each device individually.
The pieces that make data packages genuinely useful:
Map tiles give your EUDs offline imagery - critical for operations in areas with poor or no connectivity. The standard workflow is to use MOBAC (Mobile Atlas Creator) to define a geographic bounding box, select a tile source (OpenStreetMap, USGS topo, or any WMS/TMS endpoint), choose zoom levels, and export as a tile archive that ATAK can consume. The joshuafuller/ATAK-Maps repository on GitHub has 300\+ pre-built MOBAC XML configurations pointing at government and public tile services - USGS imagery, NOAA charts, FEMA flood zones, and more. Drop these XML files into your ATAK imagery/ directory, and the app will pull tiles on demand when connected, or you can pre-cache them offline via MOBAC.
Elevation data unlocks viewshed analysis and terrain heatmaps in ATAK - the ability to compute what a sensor or observer can see from a given point, accounting for terrain masking. USGS EarthExplorer (earthexplorer.usgs.gov) is the primary source for SRTM (Shuttle Radar Topography Mission) elevation data at 30-meter and 90-meter resolution. Download DTED (Digital Terrain Elevation Data) files for your area of operations, package them as a data package, and push them to your EUDs via TAK Server. The CivTAK wiki has a solid walkthrough on building SRTM packages.
WMS and TMS services let ATAK pull map layers in real-time from external servers - weather overlays, ADS-B tracks, infrastructure data, or your own GeoServer instance. These are configured via MOBAC-format XML files placed on the device or distributed as data packages.
We're not going to turn this into an ATAK imagery tutorial - that's its own post, and the community has already produced excellent resources. The TAK subreddit (r/ATAK), the CivTAK wiki, and the ATAK-Maps GitHub repo are the best starting points. The point here is that TAK Server is the distribution mechanism for all this content, and understanding data packages is how you get from "the server is running" to "the team has a shared operating picture."
Closing Thoughts
TAK Server is infrastructure. It's not a product you evaluate and buy - it's a capability you stand up, maintain, and feed with operational data. The deployment is the easiest part. The hard parts are certificate lifecycle management, keeping the server patched, distributing data packages that are actually useful, training your people to use ATAK as a coordination tool rather than just a map app, and building the operational habits that make a common operating picture worth having.
The CloudFormation template in this guide gets you from zero to a running TAK Server in under ten minutes. The hardening section gets you from "running" to "not embarrassing" and it'll take you considerably longer than ten minutes. The VPN section gets you from "accessible" to "secure." But none of it matters if the people holding the phones don't know why they're holding them.
If you're the IT person at a department that just got told to "make TAK work," here is the honest prioritization: get the server running first (this guide), get certs onto devices second, get a VPN in front of it third, and get imagery and elevation data loaded fourth. Don't try to do all of it in one weekend. Don't let perfect be the enemy of operational.
The TAK ecosystem is one of the few genuinely good things the government has given away for free. It works. The community around it - CivTAK, the TAK subreddit, the TAK Product Center Discord, the developers behind OTS and FreeTAKServer and Infra-TAK - is one of the most helpful and least gatekeepy communities in defense technology. Ask for help. People will answer.
And if your common operating picture eventually needs enrichment beyond what TAK Server provides on its own - fused sensor data, cross-domain correlation, identity resolution, automation policies - you know where to find us.
Empyrean Defense builds operational intelligence and decision support tools for defense and public safety. Our platform integrates with TAK Server as a native CoT data source, pushing fused tracks and operational data to ATAK end user devices. Learn more at empyreandefense.com.
Resources
- TAK Product Center: tak.gov
- TAK Server on GitHub: TAK-Product-Center/Server
- OpenTAKServer (OTS): github.com/brian7704/OpenTAKServer
- FreeTAKServer (FTS): github.com/FreeTAKTeam/FreeTakServer
- ATAK Maps Collection: github.com/joshuafuller/ATAK-Maps
- Cloud-RF TAK Server Docker Setup: github.com/Cloud-RF/tak-server
- COTAK (Colorado): cotak.gov
- Infra-TAK: civtak.org
- TAK-Portal: civtak.org
- CivTAK Community: civtak.org
- USGS EarthExplorer: earthexplorer.usgs.gov
- MOBAC (Mobile Atlas Creator): mobac.sourceforge.io
- WireGuard: wireguard.com
- ZeroTier: zerotier.com
- Tailscale: tailscale.com
Related Reading on Empyrean Defense
- What is ATAK? — a plain-language guide to the TAK ecosystem: clients, EUDs, data packages, CoT, federation, and plugins
- ATAK FAQ — quick answers on ATAK, TAK Server, data packages, and how systems integrate
- ATAK Integration & Deployment Recipe — how Empyrean pushes fused tracks into TAK Servers via CoT
- What is a Common Operating Picture? — what TAK Server helps you build
- What is Intelligence Fusion? — from a shared map to a fused decision surface
- What is OPSEC? — the security discipline behind hardening your deployment
- Glossary — every acronym on this page, expanded
